Chapter Contents:
In this chapter, we will cover the fundamental principles of working with UVs. The goal is to prepare a model for texturing, learn how to check UVs, unfold a model into two-dimensional space, correctly place UV islands, and identify texture stretching.
Lesson Structure
1. Open the UV Editor and create the initial unwrapping. What is UV? 2. Model Preparation. 3. Creating the Primary Unwrapping. 4. Performing Unfold and correcting distortions. 5. Laying out islands using Layout and assigning a Checker Texture.
3.1. What is UV?
Explanation that a texture is a two-dimensional image, and UV coordinates determine how that image is mapped onto the surface of a three-dimensional model.
A simple analogy: A UV unwrap is similar to a pattern piece, which allows you to lay the surface of an object flat.
Breakdown of key concepts: — UV coordinates U and V; — UV shell — an isolated island in the unwrap; — seam — the place where the surface is cut to unfold it; — texel density — the density of texture resolution on the surface; — stretching and overlapping of UV islands. Show how a poor unwrap leads to distortion of the image, uneven detail, and texture issues.
3.2. Model Preparation
Before unwrapping, you must check the geometry and scene organization.
- Ensure the model is complete for the current stage.
- Verify object names.
- Delete unnecessary test elements.
- Check the operation history and transformations where necessary.
- Save a backup version of the scene.
3.3. Creating the Initial Layout
Core Projection Methods: — Planar Mapping — for relatively flat surfaces. — Cylindrical Mapping — for cylindrical parts. — Automatic Mapping — for the initial breakdown of a complex form into sections.
3.4. Seams, Cut, Sew, Unfold
1. Select the edges along which the seam will run. 2. Perform Cut UV Edges. 3. Divide the surface into manageable sections. 4. Perform Unfold to flatten the islands. 5. Use Sew if separate boundaries need to be joined. 6. Check the shape of the UV islands for significant distortions.The explanation is that seams should be placed in less visible areas when appropriate to the object’s form. However, an overly complex unwrapping with minimal seams can end up looking worse than a simple, practical one.
3.5. Layout and Checker Review
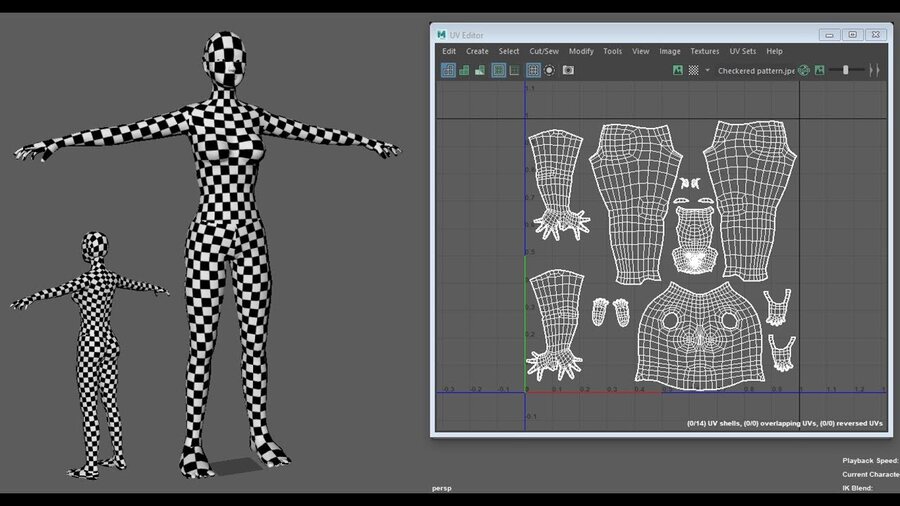
Explanation of how to scale, rotate, and place islands in UV space.Then, assign a test checkerboard texture and check the model in the 3D view.Common mistakes: — stretched or compressed cells — too different cell scale on similar surfaces — overlapping islands where it is not intended — islands extending beyond the allowable area — inefficient use of space.
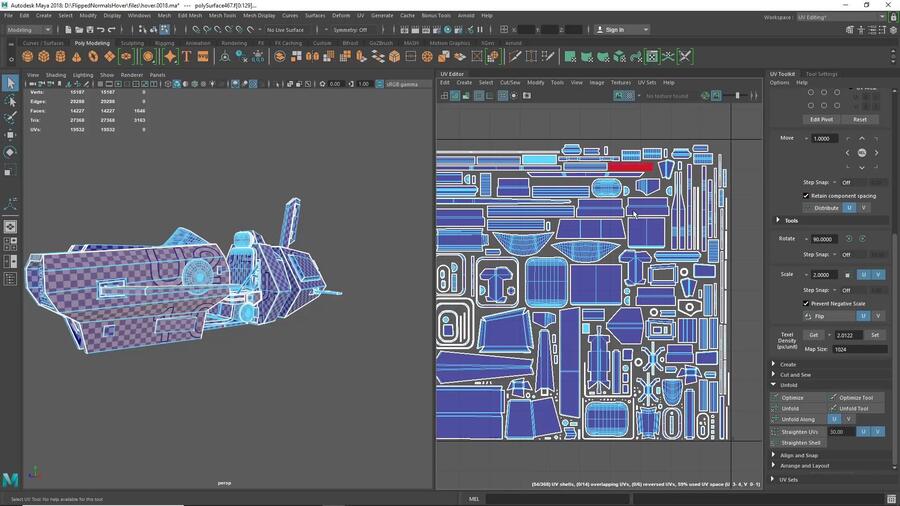
Independent Practice: Correct detected stretching and overlaps, and prepare the final UV map. Take screenshots of the UV editor and checker for your model.
Assignment Example